
Reading the whole guide takes about 5 minutes. It covers the desktop app, which works while your computer is on and the app is open; the web version needs no installation.
Before you download
- Mac: Apple silicon only (M1, M2, M3, M4 or later), macOS 13 or later. This build does not run on Intel Macs yet.
- Check your Mac: click the Apple menu in the top-left corner and choose About This Mac. If the Chip line says "Apple M…", your Mac can run it.
- Windows: the Windows build is still being tested and has not been run on a real PC yet. If something goes wrong, send us a screenshot.
Part 1. Install on Mac
The app is not certified by Apple yet, so your Mac blocks it the first time you open it. That is expected for a trial build, and you only need to allow it once.
- Open the downloaded file
Agent-Space-1.0.0-Mac.dmg. - Drag the Agent Space icon into the Applications folder.
System screen. Illustration coming soon.
- Open the Applications folder and double-click Agent Space.
- Your Mac says the app cannot be opened. Click Done (or OK). Do not click Move to Trash.
System screen. Illustration coming soon.
- Open System Settings.
- Click Privacy & Security in the left column.
- Scroll down to the Security section.
- Click Open Anyway on the line about Agent Space.
System screen. Illustration coming soon.
- Enter your Mac password if asked.
- Click Open in the dialog that appears.
From then on, Agent Space opens like any other app.
On macOS 14 or earlier there is a quicker way: in the Applications folder, right-click Agent Space, choose Open, then click Open again. This shortcut no longer works on macOS 15; use steps 5 to 10 above instead.
If you do not see Open Anyway: try to open Agent Space once more, then go back to Privacy & Security. The button only appears right after your Mac blocks the app.
Part 2. Install on Windows (still being tested)
The installer does not have a digital signature yet, so Windows shows a warning. This is expected for a trial build.
- Open the downloaded file
Agent-Space-1.0.0-Windows-Setup.exe. - Windows shows a blue screen saying Windows protected your PC. Click More info.
System screen. Illustration coming soon.
- Click Run anyway.
System screen. Illustration coming soon.
- Choose a language, then follow the installer's steps.
- Open Agent Space from the Start menu.
If the installer does not run, or the app opens but does not work, take a screenshot and send it to us.
Part 3. Three 2-minute lessons
Lesson 1. Activate your 14-day trial
You need a licence to use the AI, and the trial gives you one free for 14 days.
- In Agent Space, click Settings in the left column.
- On the Licence & account card, click Sign up for the trial.
- Create your account on the web page that opens. Your 14-day trial starts automatically.
- Go back to Agent Space. On the This device ID line, click Copy.
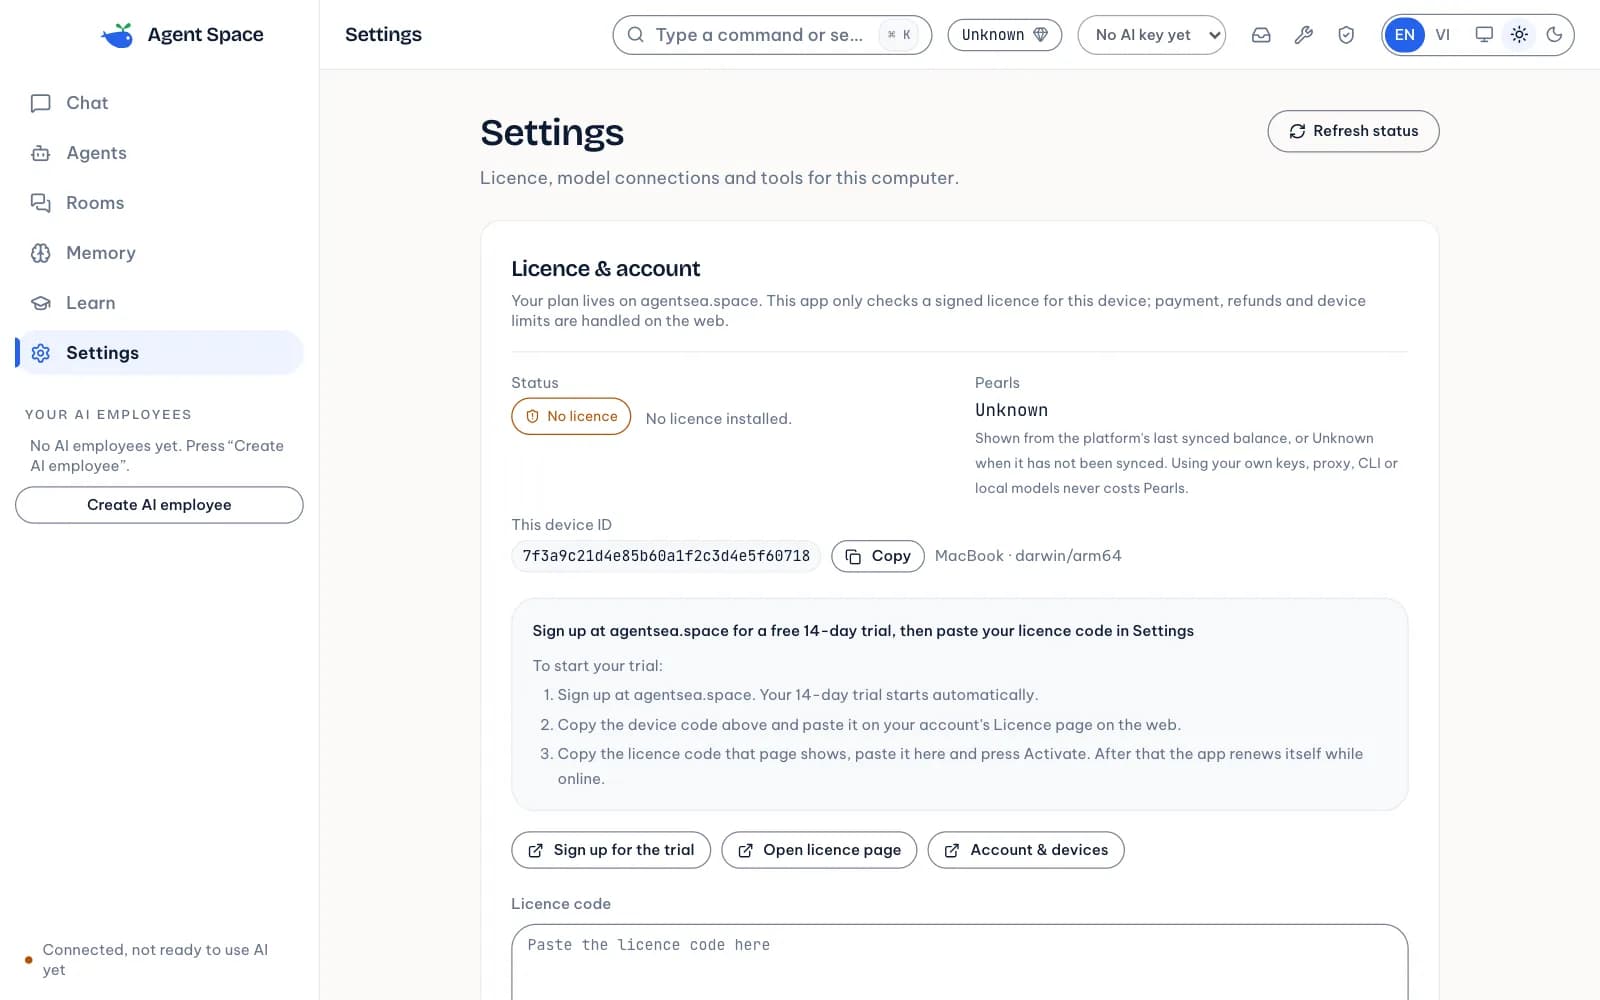
- Click Open licence page.
- Paste the device ID on the licence page on the web.
- Copy the licence code that the web page shows.
- Go back to Agent Space. Paste the code into the box Paste the licence code here.
- Click Activate.
When it works, Status shows Active. After that, the app renews the licence by itself while you are online.
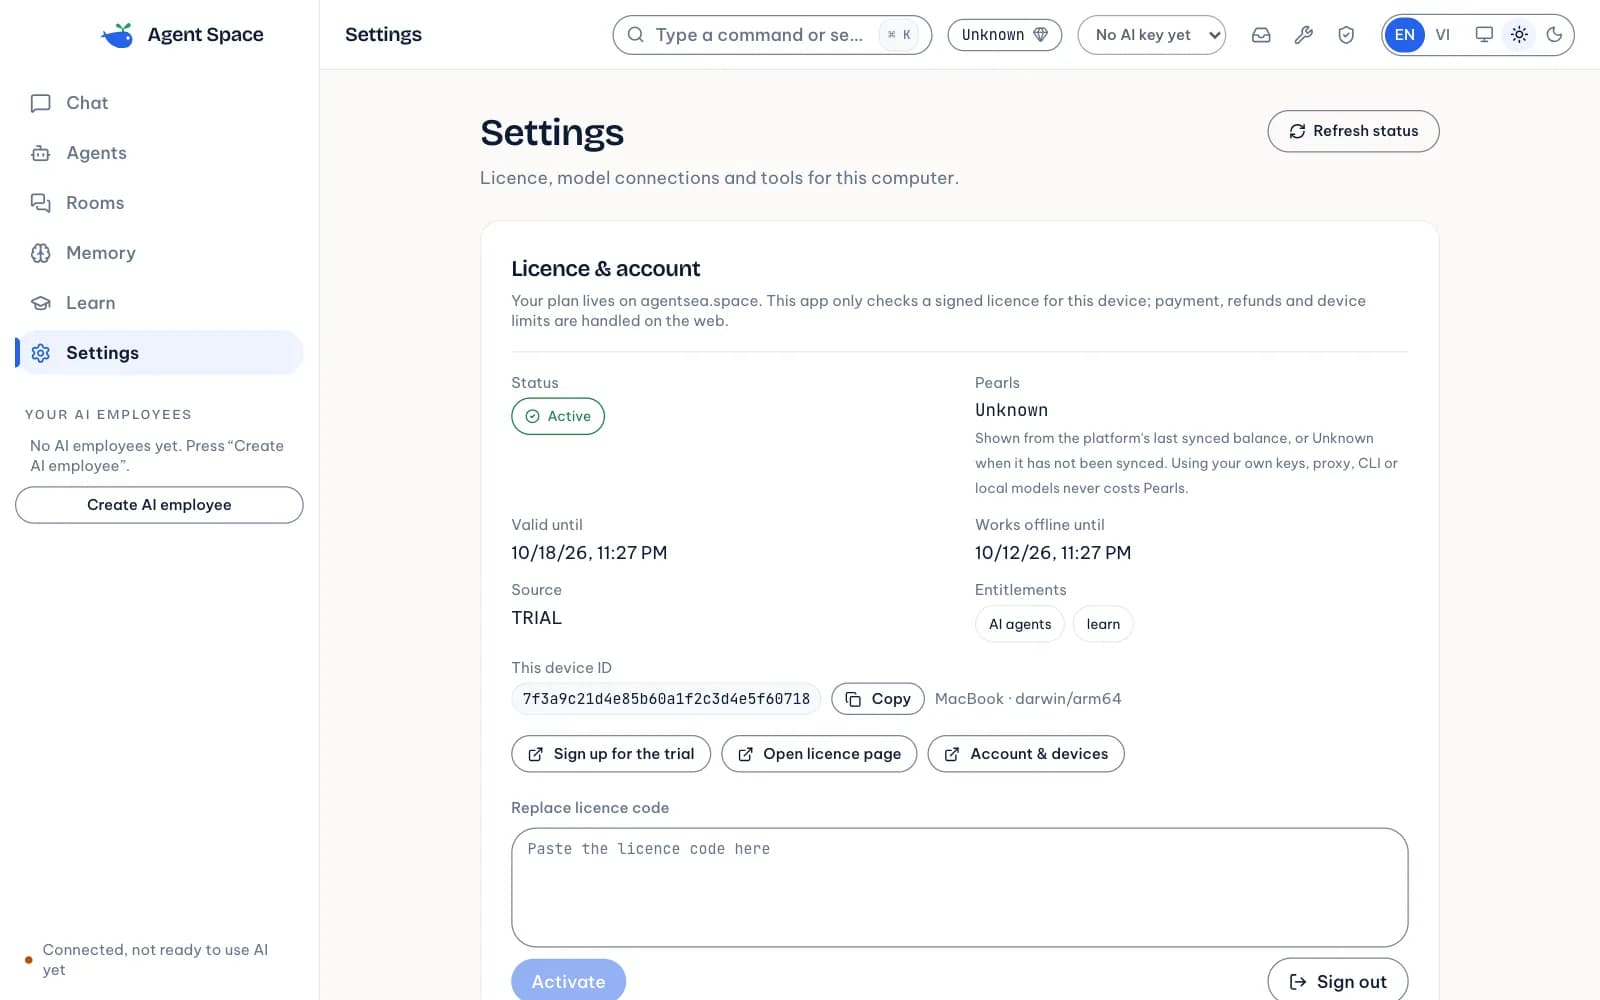
If no browser opens when you click Sign up for the trial or Open licence page, the app shows the web address. Copy it and open it in your browser yourself.
Lesson 2. Add your AI key and chat for the first time
Agent Space uses your own AI key, for example an OpenAI key. The key is stored on this computer only. The company that provides the key bills you directly for AI use.
- Get a key from the AI provider you use.
- In Agent Space, click Settings.
- Scroll down to the Connect your own model card.
- Under Starting point, choose your key's provider: OpenAI, Google Gemini, OpenRouter or DeepSeek. The line underneath tells you where to get a key.
- Paste your key into the API key box.
- Click Save connection.
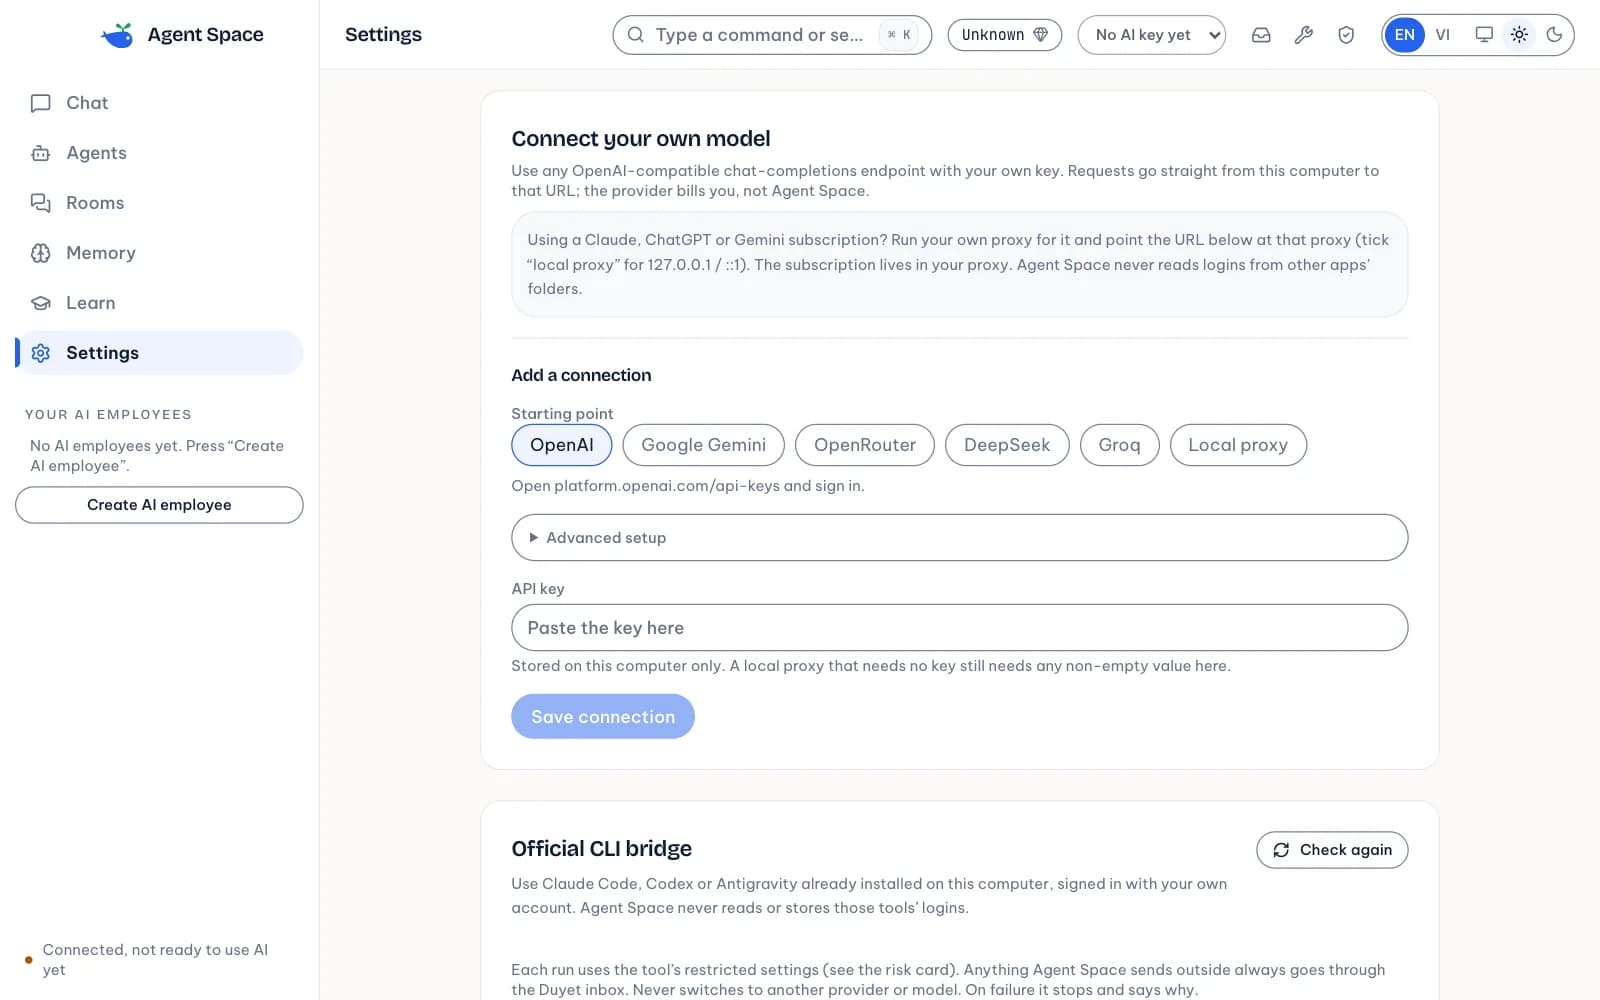
- Click Chat in the left column.
- Click a suggestion, or type your request into the Message your AI team… box.
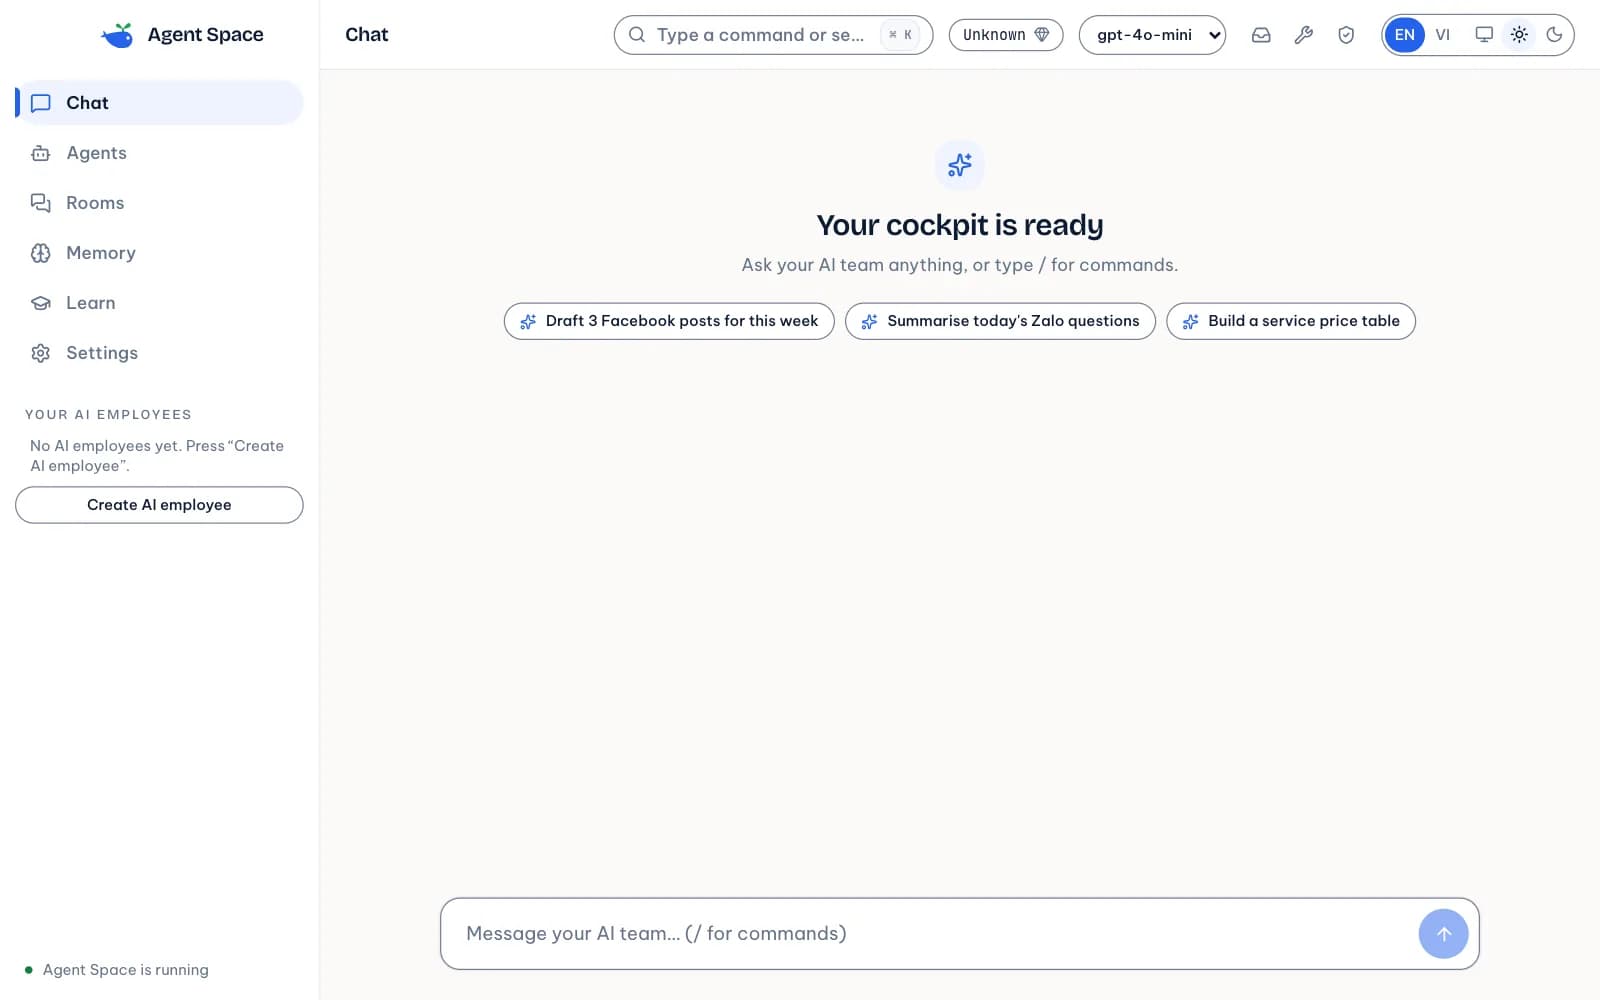
- Click the arrow button, or press Enter.
If an error message appears, check your key again under Settings.
Lesson 3. Stop the AI and approve before anything is sent
Stop the AI mid-reply. While the AI is replying, the send button turns into a square Stop button.
- Click the square Stop button on the right of the message box.
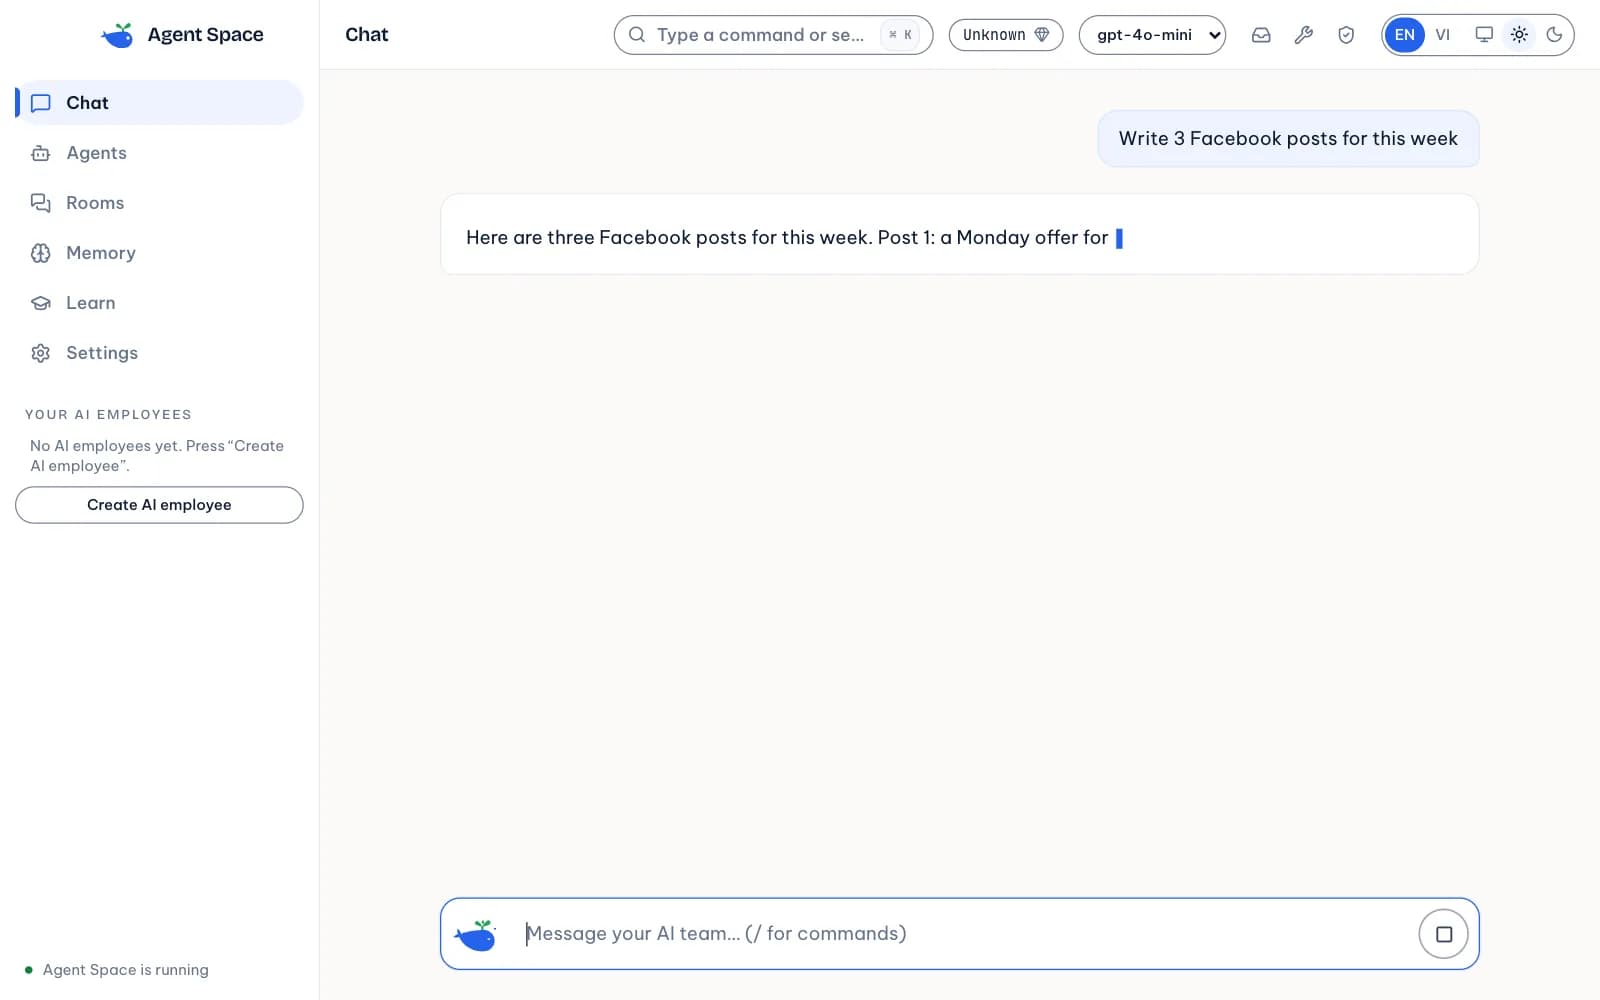
The AI stops writing straight away. In Rooms, the Stop the agents that are replying button stops every AI employee that is replying at once.
Approve before sending. Your AI employee never sends a message to a customer on its own. Every message waits for your approval first.
- Click Approvals in the left column, or click the inbox icon with a number in the top bar.
- On the Needs you tab, read the customer's Original message and the exact text that will be sent.
- Click Approve and send to send it, or Reject to drop it.
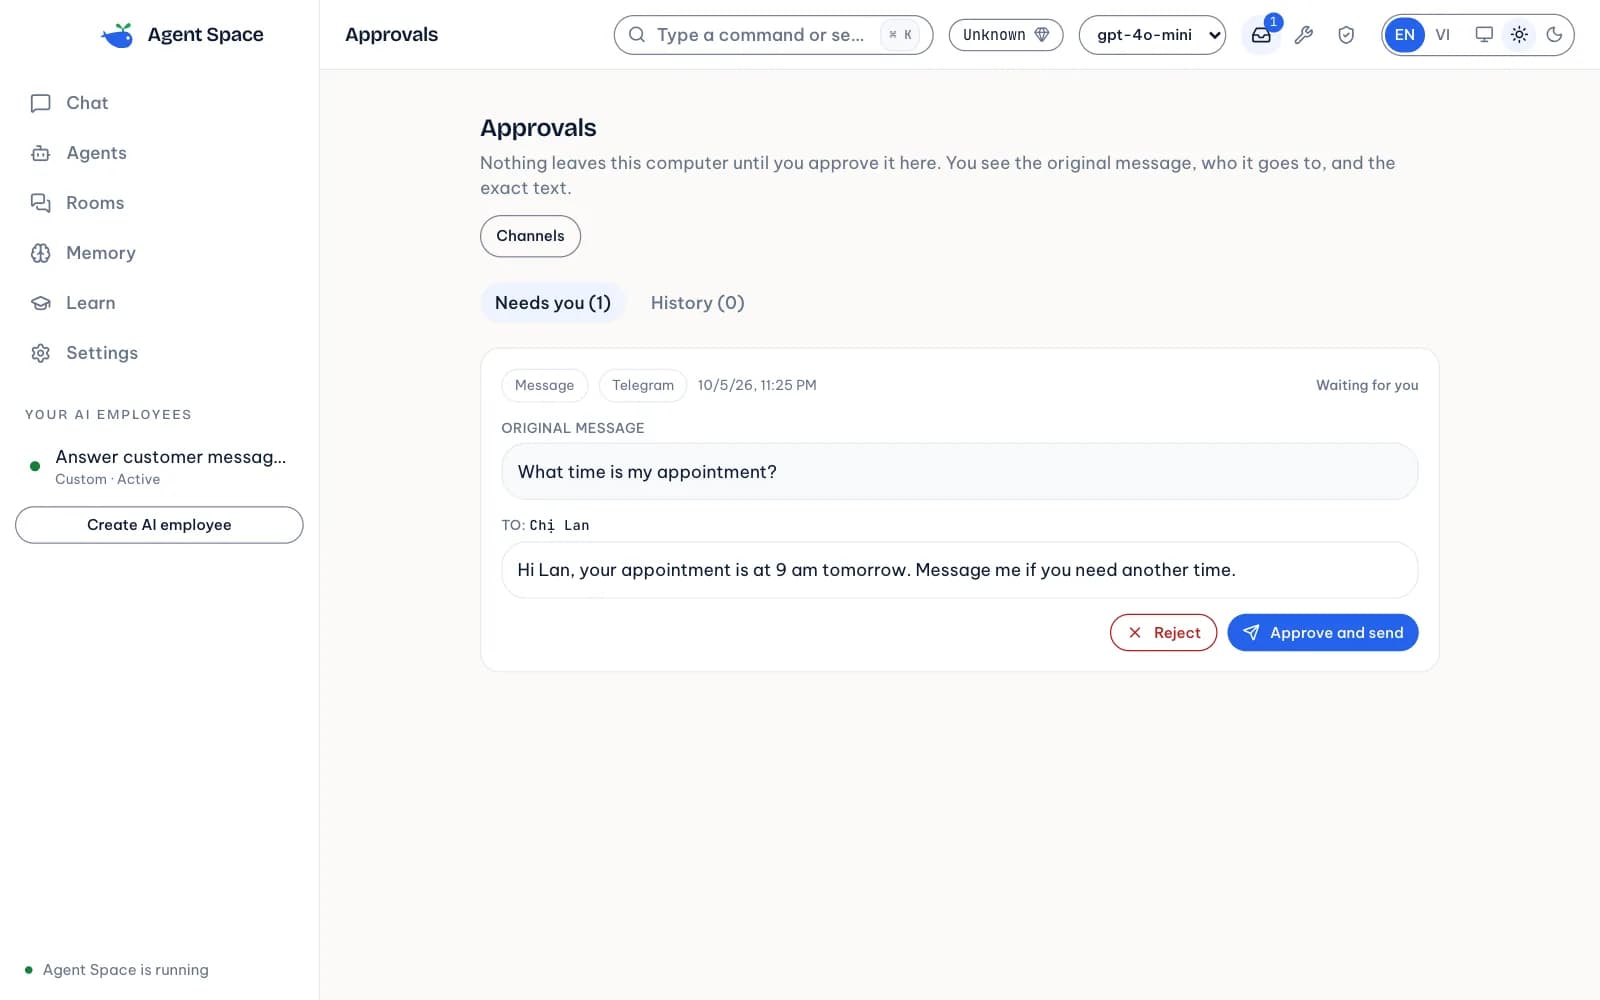
No message goes to a customer until you approve it.
Need help?
Message Amon on Zalo: https://zalo.me/0348852593. Send a screenshot and a short description of what you were doing; never send passwords or OTP codes.